 Ready in: 1 hour 30 minutes · Serves: 12 · Technique: Baking · Storage: 3-4 days in the refrigerator.
Quick Answer
This Chocolate Whoopie Pie Cake is a delightful, rich chocolate dessert with a creamy filling, perfect for holiday gatherings.As the crisp autumn air settles in and the leaves playfully dance down the streets of New York City, my thoughts turn to the comforting delights of the season. The holidays are just around the corner, and I can't help but feel an overwhelming urge to bake something that not only warms the soul but also brings a sense of nostalgia. That's where this charming Chocolate Whoopie Pie Cake comes in - it's the perfect addition to any Thanksgiving or Christmas gathering.
A Cozy Holiday Treat
With its rich, chocolatey goodness and creamy filling, this cake is reminiscent of the classic whoopie pie in a grander form. As soon as I dive into the baking process, my kitchen fills with the sweet, intoxicating scent of chocolate. The promise of a slice of this cake is enough to bring a smile to anyone's face.
Why You'll Love This Recipe
- Rich, chocolatey flavor that satisfies your sweet cravings.
- Combines the nostalgic feel of whoopie pies with the grandeur of a cake.
- Perfect for holiday gatherings, bringing warmth and joy to your celebrations.
- Easy-to-follow instructions ensure baking success for both beginners and experienced bakers.
- Makes for delightful leftovers that taste even better the next day!
Ingredients
Get ready to gather these delicious components for your Chocolate Whoopie Pie Cake!
For the Chocolate Cake:
- 1 ¾ cups all-purpose flour
- 1 cup unsweetened cocoa powder
- 2 cups granulated sugar
- 1 ½ teaspoons baking soda
- 1 teaspoon baking powder
- 1 teaspoon salt
- 2 large eggs
- 1 cup buttermilk
- 1 cup hot water
- ½ cup vegetable oil
- 2 teaspoons pure vanilla extract
For the Whoopie Pie Filling:
- 1 cup unsalted butter, softened
- 4 cups powdered sugar
- ½ cup marshmallow fluff
- 2 teaspoons pure vanilla extract
- 1-2 tablespoons milk (if needed for consistency)
How to Make Chocolate Whoopie Pie Cake (Step-by-Step)
Let's embark on a delightful journey to create this rich and nostalgic cake!
Step 1: Preheat the Oven
First, preheat your oven to 350°F (175°C). Prepare your two 9-inch round cake pans by greasing and flouring them. I find that lining the bottoms with parchment paper helps with easy release.
Step 2: Mix the Dry Ingredients
In a large mixing bowl, whisk together the all-purpose flour, cocoa powder, granulated sugar, baking soda, baking powder, and salt until they are well combined.
Step 3: Combine Wet Ingredients
In a separate bowl, beat the eggs and then add in the buttermilk, hot water, vegetable oil, and vanilla extract. The mixture should be smooth and slightly warm to the touch.
Step 4: Combine Wet and Dry Mixtures
Gradually pour the wet ingredients into the dry mixture, whisking gently until everything is thoroughly combined. The aroma of chocolate should start filling your kitchen at this point!
Step 5: Prepare the Batter for Baking
Divide the batter evenly between the two prepared cake pans, smoothing the tops with a spatula to ensure an even bake.
Step 6: Bake the Cake
Place the pans in the oven and bake for 30-35 minutes. To check for doneness, insert a toothpick into the center of the cakes; it should come out clean or with a few moist crumbs. Enjoy the delightful scent of cooking chocolate and vanilla!
Step 7: Cool the Cakes
Once the cakes are baked, remove them from the oven and let them cool in the pans for about 10 minutes. Afterward, gently take them out of the pans and let them cool completely on a wire rack.
Step 8: Prepare the Whoopie Pie Filling
While the cakes are cooling, let's make the filling. In a large mixing bowl, beat the softened butter until creamy. Gradually add the powdered sugar, mixing until well combined, then add in the marshmallow fluff and vanilla extract. If the filling is too stiff, add milk one tablespoon at a time until you achieve a smooth and creamy consistency.
Step 9: Assemble the Cake
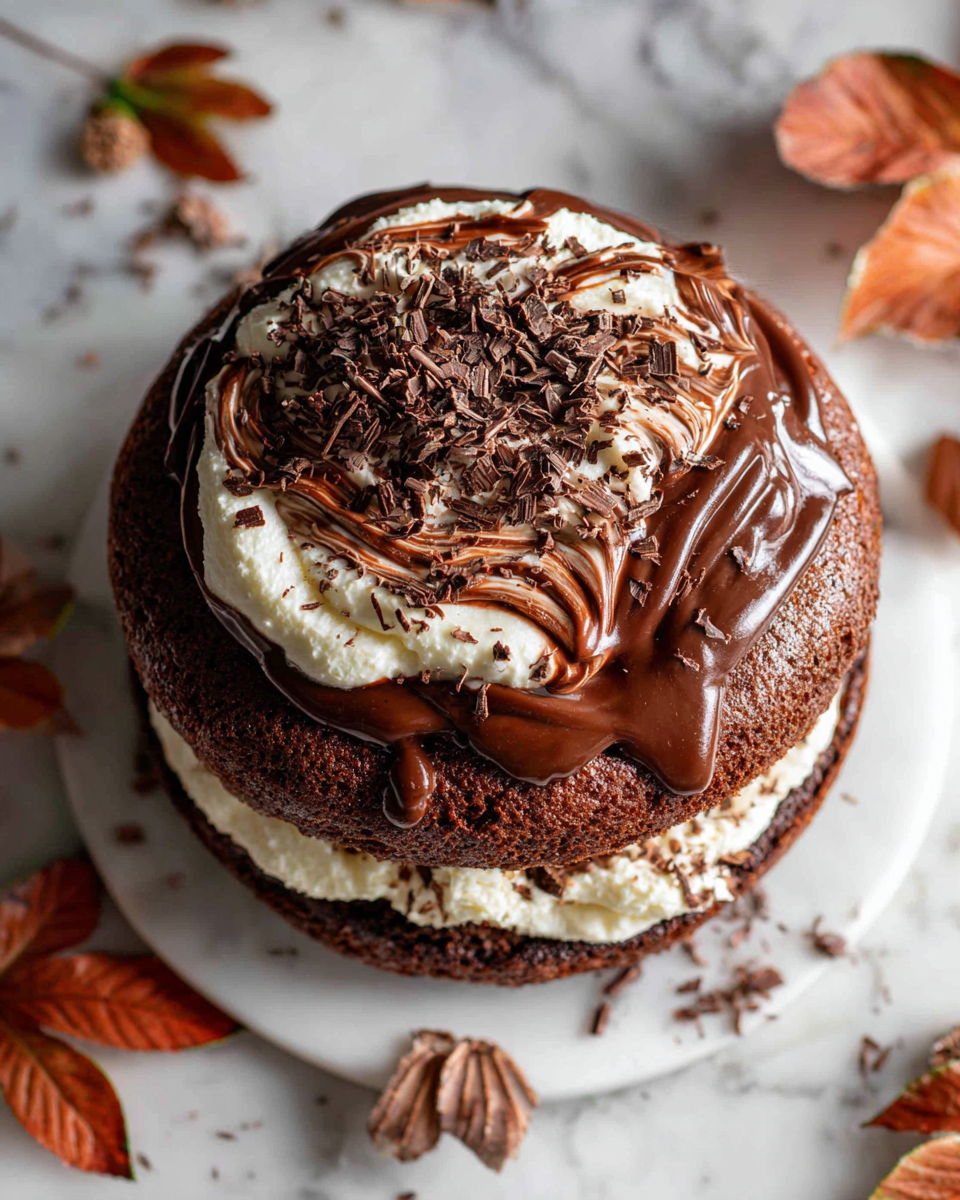
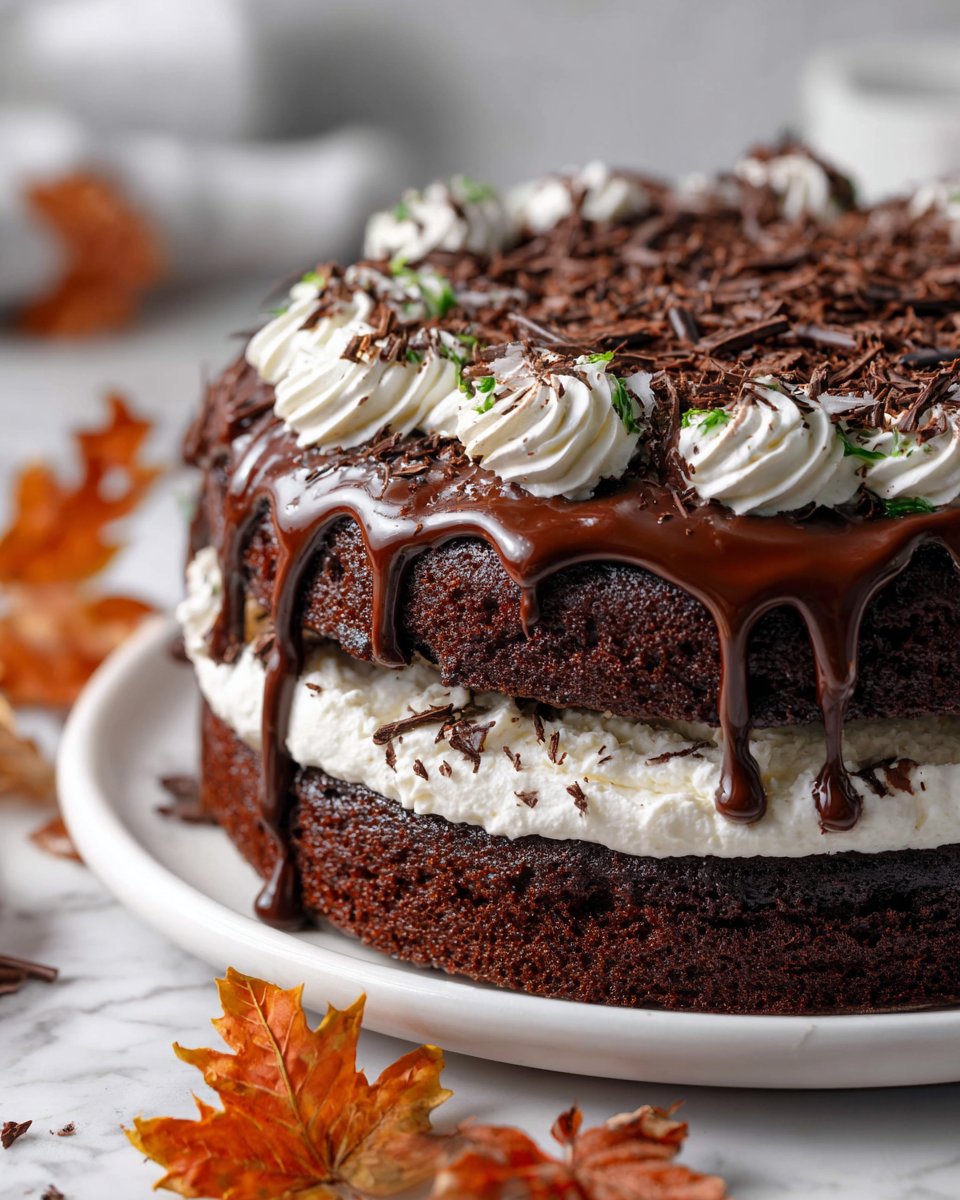
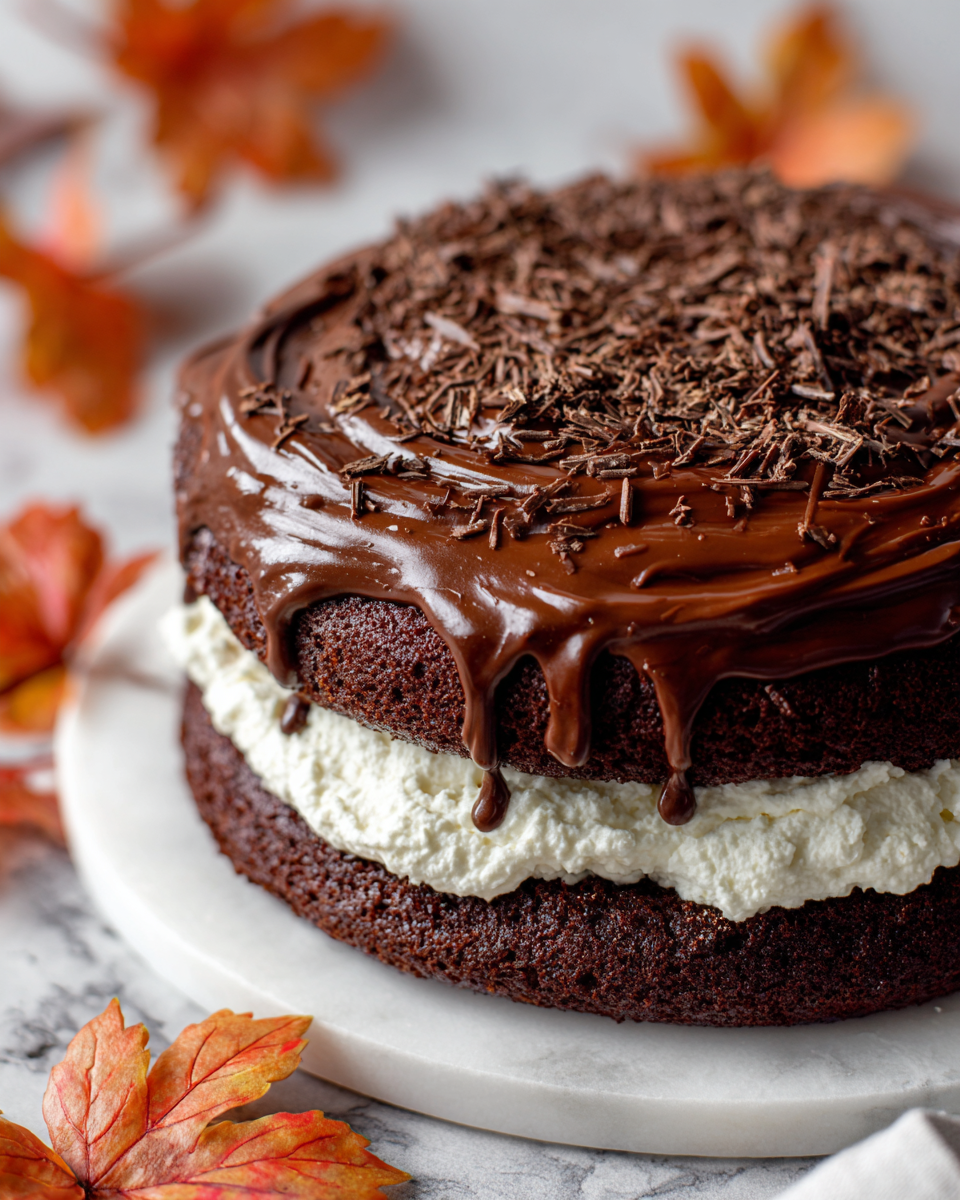
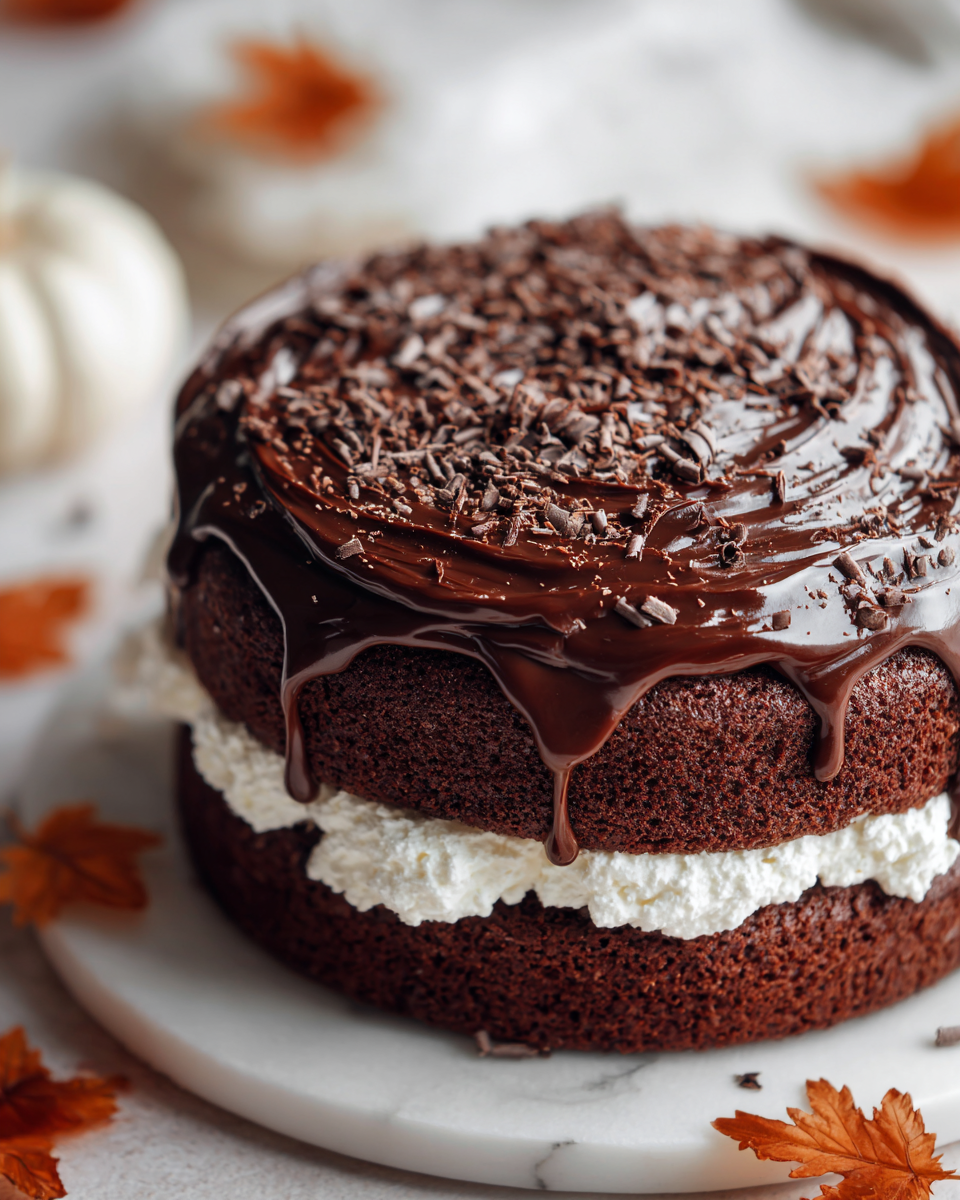
Once the cakes are completely cooled, it's time to assemble. Place one layer on a serving plate, spread a generous layer of filling on top, and then carefully place the second layer over it. For best results, I like to use an offset spatula for a smooth finish. Finally, spread the remaining filling on top and let it swirl down the sides for an extra delightful presentation!
Common Mistakes to Avoid:
- Overmixing the batter: It can lead to a dense cake; mix just until combined.
- Not checking for doneness: Ovens can vary, so rely on the toothpick test rather than solely on the timer.
- Using cold ingredients: Make sure your eggs and buttermilk are at room temperature for a better emulsion.
Tips and Tricks for Success:
- For an extra touch, sprinkle some chocolate shavings or festive sprinkles on top right before serving.
- If you want a more intense chocolate flavor, consider adding a teaspoon of espresso powder to the batter.
- This cake freezes beautifully! Wrap it tightly in plastic wrap and foil for up to three months.
Variations:
- Use different flavored cake mixes, such as vanilla or red velvet, for a unique twist.
- Replace the marshmallow fluff with cream cheese for a tangy filling.
- Add crushed nuts or chocolate chips to the batter for extra texture.
How to Serve:
- Slice into generous wedges and serve with a dollop of whipped cream.
- Accompany with a scoop of vanilla ice cream for a delightful dessert.
- Garnish with fresh berries for a pop of color and flavor contrast.
Make Ahead and Storage
- Make Ahead: You can prepare the cake layers a day in advance and store them wrapped in plastic wrap at room temperature.
- Storage: Store any leftovers in an airtight container in the refrigerator for up to 3-4 days.
- Reheating: Allow the cake to sit at room temperature for about 20 minutes before serving again to enhance the flavors.
- Freezing: This cake freezes beautifully! Wrap it tightly in plastic wrap and foil for up to three months.
Recipe Notes / What I Learned
Baking this Chocolate Whoopie Pie Cake has reminded me that some of the best moments in life are shared over dessert. Plus, watching my loved ones light up at the first bite makes all the effort worthwhile. This charming cake is bound to be a centerpiece for my upcoming holiday festivities!
Yield and Serving Size
Yield: 12 servings · Serving Size: 1 slice
Nutrition Snapshot
Estimated Nutrition Per Serving: ~350 calories · 4g protein · 50g carbs · 17g fat
Recipe by:
Indulgent Chocolate Whoopie Pie Cake
Ingredients
Equipment
Method
- Preheat your oven to 350°F (175°C) and prepare your two 9-inch round cake pans by greasing and flouring them.
- In a large mixing bowl, whisk together the all-purpose flour, cocoa powder, granulated sugar, baking soda, baking powder, and salt until well combined.
- In a separate bowl, beat the eggs and then add in the buttermilk, hot water, vegetable oil, and vanilla extract. Mix until smooth.
- Gradually pour the wet ingredients into the dry mixture, whisking gently until thoroughly combined.
- Divide the batter evenly between the two prepared cake pans, smoothing the tops with a spatula.
- Bake for 30-35 minutes, checking for doneness with a toothpick.
- Let the cakes cool in the pans for about 10 minutes, then remove from pans and cool completely on a wire rack.
- While the cakes are cooling, prepare the filling by beating the softened butter until creamy, then gradually add powdered sugar until smooth. Mix in marshmallow fluff and vanilla extract.
- Assemble the cake by placing one layer on a serving plate, spreading a layer of filling on top, and then adding the second layer. Spread the remaining filling on top.
Notes
FAQs
1. Can I make Chocolate Whoopie Pie Cake ahead of time?
Yes, you can bake the cake layers in advance. Once cooled, wrap them tightly in plastic wrap and store them in the refrigerator for up to 3-4 days.
2. Can I substitute ingredients in this recipe?
Absolutely! You can use different types of flour, such as whole wheat, but keep in mind it may alter the texture. For a dairy-free option, substitute buttermilk with almond or soy milk mixed with vinegar.
3. How can I make the cake less sweet?
To reduce sweetness, you can decrease the amount of powdered sugar in the filling or add a pinch of salt to balance the sweetness.
4. What can I do if my cake layers are not rising?
Ensure your baking soda and baking powder are fresh, and double-check that your oven is at the correct temperature before baking.
5. How should I store the leftovers?
Store any leftovers in an airtight container in the refrigerator for up to 3-4 days. Let them sit at room temperature for about 20 minutes before serving for the best flavor.