 Ready in: 30 minutes · Serves: 8 · Technique: Baking · Storage: Airtight container for 2 days or freeze for 1 month.
Quick Answer
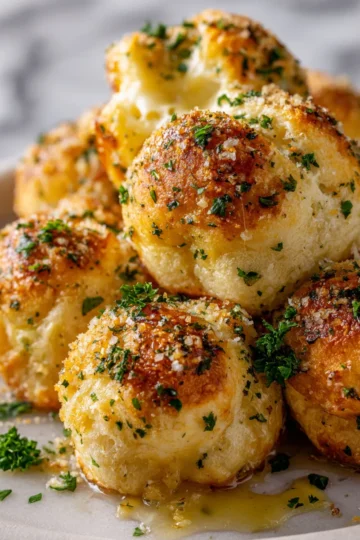
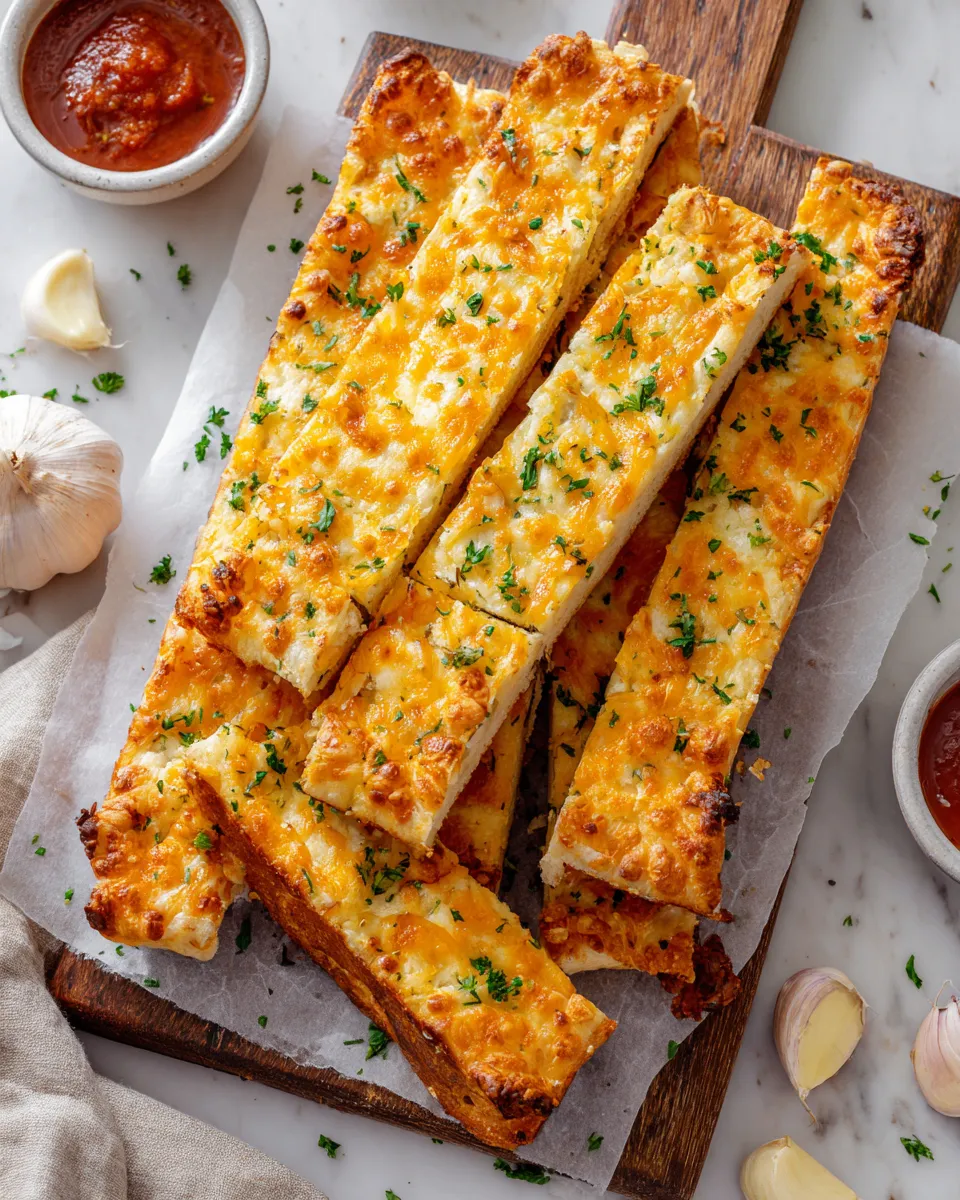
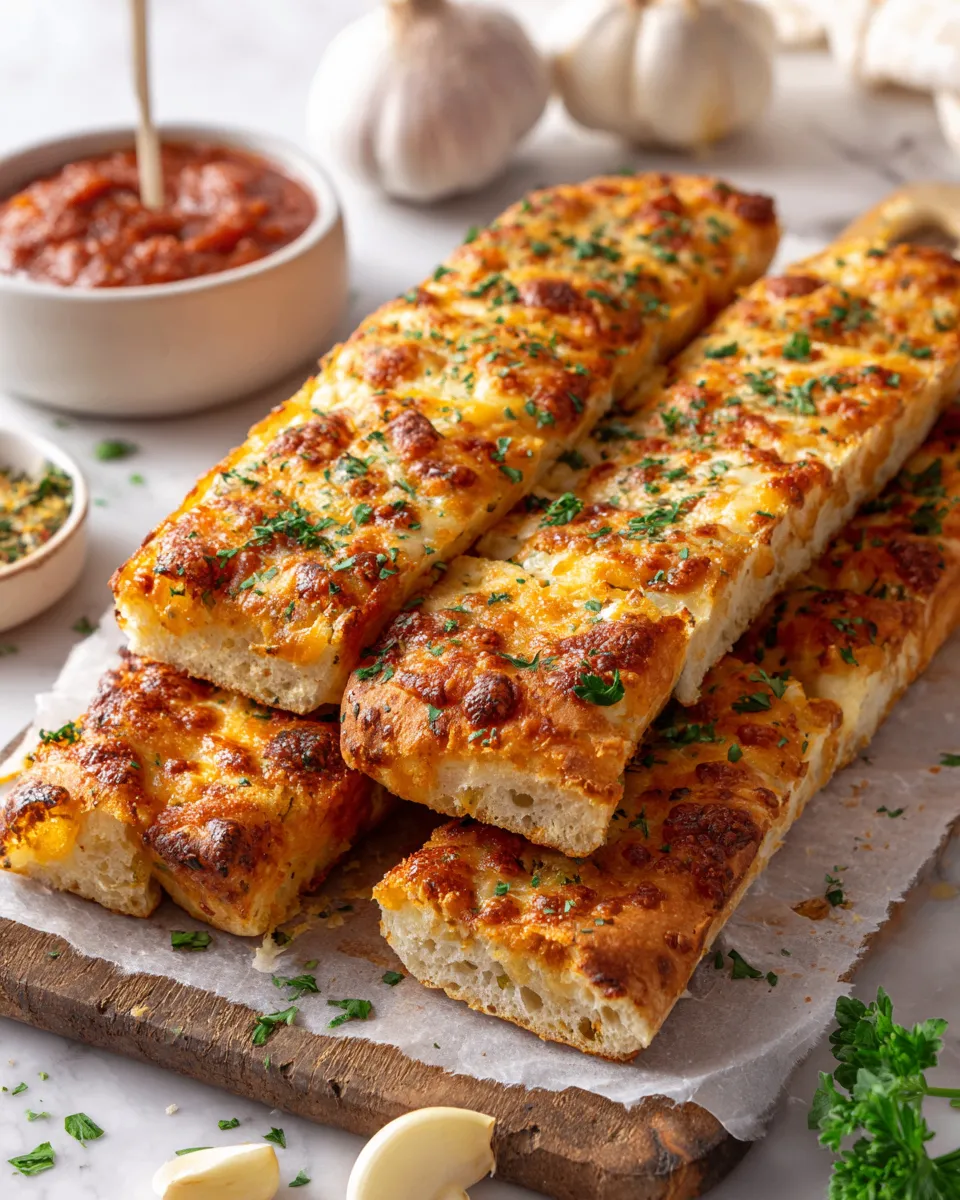
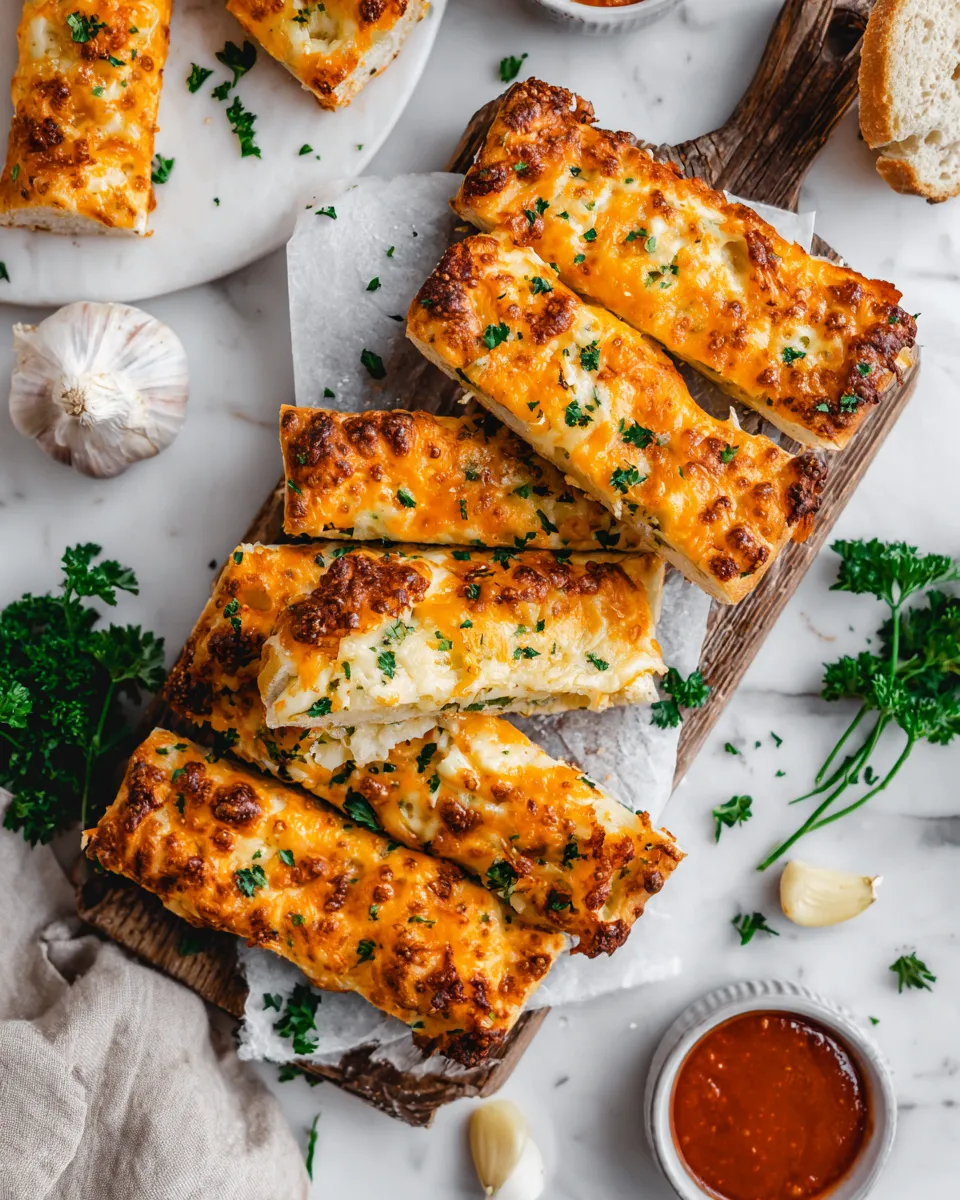
These cheesy cheddar garlic breadsticks are easy to make and perfect for any holiday gathering, combining simple ingredients into a deliciously warm appetizer.As the holidays approach and the crisp New York air envelops the city in its chilly embrace, I find myself daydreaming about the perfect appetizer to share at my upcoming Thanksgiving and Christmas gatherings. These cheesy cheddar garlic breadsticks have become my go-to recipe. Not only do they bring a comforting warmth to the table, but their delightful aroma pulls family and friends into the kitchen, eagerly awaiting the first bite.
A Cozy Holiday Treat
Why You'll Love This Recipe
- These breadsticks are incredibly easy to make, ensuring you spend less time in the kitchen and more time with your loved ones during the holidays.
- The intoxicating aroma of garlic and melted cheddar wafts through your home, drawing family and friends into the kitchen in anticipation.
- They can be customized with different cheeses and herbs, making them a versatile addition to any meal or gathering.
- Served warm, these cheesy garlic breadsticks are the ultimate comfort food, perfect for cozy autumn and winter evenings.
- Leftovers can be easily stored and reheated, allowing you to enjoy these delicious treats long after the gathering is over.
Ingredients
Gather your ingredients to ensure a smooth baking experience:
- 2 cups all-purpose flour
- 1 tablespoon baking powder
- 1 teaspoon garlic powder
- ½ teaspoon salt
- ½ teaspoon black pepper
- ¾ cup shredded sharp Cheddar cheese
- 1 cup buttermilk
- ¼ cup unsalted butter, melted
- 2 tablespoons garlic butter (melted) for brushing
- Fresh parsley, chopped for garnish
How to Make Cheesy Cheddar Garlic Breadsticks (Step-by-Step)
Follow these steps to create the perfect cheesy cheddar garlic breadsticks that will impress your guests this holiday season.
Step 1: Preheat the Oven
Preheat your oven to 425°F (220°C). I love how this instant warmth fills my kitchen with anticipation.
Step 2: Combine the Dry Ingredients
Combine the flour, baking powder, garlic powder, salt, and black pepper in a large mixing bowl. Use a whisk to blend them thoroughly - the soft, powdery texture creates a comforting base for these breadsticks.
Step 3: Add the Cheese
Stir in the shredded Cheddar cheese until it's evenly distributed, offering little pockets of cheesy goodness in each bite. The bright orange color of the cheese against the white flour makes me feel festive already!
Step 4: Mix in the Wet Ingredients
Add the buttermilk and melted butter into the dry mixture. Fold gently with a spatula until everything is just combined. The dough will be slightly sticky, and that's perfectly okay. You want it to be cohesive yet tender, ready to rise beautifully in the oven.
Step 5: Knead the Dough
Transfer the dough onto a floured surface and gently knead it a few times, just until it comes together. Be careful not to overwork it! I like to shape it into a rectangle to make cutting easier later.
Step 6: Cut the Dough
Cut the dough into long strips, about 1 inch wide. I often use a pizza cutter for a clean cut and swift action. Place them on a baking sheet lined with parchment paper, spacing them about an inch apart.
Step 7: Brush with Garlic Butter
Brush the tops with the melted garlic butter. This step not only adds richness but also leaves a tantalizing aroma wafting through your kitchen.
Step 8: Bake
Bake in the preheated oven for 12 to 15 minutes or until golden brown, and the center has a slight jiggle. The edges will crisp up beautifully, and when you pull them out, the nutty aroma of the garlic butter will envelop you.
Step 9: Garnish and Serve
Garnish with freshly chopped parsley before serving. The vibrant green color adds a refreshing touch, complementing the cheesy decadence of the breadsticks.

Common Mistakes to Avoid
- Over-kneading the dough: This will lead to tough breadsticks instead of the desired tenderness.
- Skipping the buttermilk: Regular milk will not provide the same richness and tang, resulting in a less flavorful breadstick.
- Not preheating the oven: Baking your breadsticks in a properly preheated oven ensures they rise and cook evenly.
Tips and Tricks for Success
- Experiment with cheeses: Feel free to mix and match different cheeses like Gruyère or mozzarella for a unique flavor profile.
- Add herbs: Mix fresh herbs like rosemary or thyme into the dough for an aromatic twist.
- Serve warm: These breadsticks are best enjoyed straight from the oven, but you can reheat them in a toaster oven for a delightful crunch.
Variations
- Use a blend of cheeses for a different flavor.
- Incorporate spices like red pepper flakes for added heat.
- Try using whole wheat flour for a healthier option.
How to Serve
- Pair with marinara or garlic dipping sauce for extra flavor.
- Serve alongside soups or salads for a complete meal.
- Garnish with extra parsley or grated cheese for presentation.
Make Ahead and Storage
- Make Ahead: Prepare the dough in advance and refrigerate it for up to 24 hours before baking.
- Storage: Allow leftover breadsticks to cool completely, then store in an airtight container at room temperature for up to 2 days.
- Reheating: Reheat in a toaster oven for a delightful crunch.
- Freezing: Place cooled breadsticks in a freezer-safe bag; they'll last for a month. Bake directly from the freezer when ready to enjoy.
Recipe Notes / What I Learned
Baking these cheesy cheddar garlic breadsticks taught me the true joy of sharing comforting food with loved ones. The simple ingredients come together to create a dish that can brighten any chilly holiday gathering. With every bite, I savor the memories made around the table.Yield and Serving Size
Yield: 12 breadsticks · Serving Size: 1 breadstickNutrition Snapshot
Estimated Nutrition Per Serving: ~150 calories · 5g protein · 20g carbs · 6g fat
Recipe by:
Cheesy Cheddar Garlic Breadsticks
Ingredients
Equipment
Method
- Preheat your oven to 425°F (220°C).
- Combine flour, baking powder, garlic powder, salt, and black pepper in a large mixing bowl. Use a whisk to blend them thoroughly.
- Stir in the shredded Cheddar cheese until evenly distributed.
- Add buttermilk and melted butter into the dry mixture and fold gently until just combined.
- Transfer the dough onto a floured surface and gently knead a few times until it comes together.
- Cut the dough into long strips, about 1 inch wide, and place on a baking sheet lined with parchment paper.
- Brush the tops with melted garlic butter.
- Bake in the preheated oven for 12 to 15 minutes or until golden brown.
- Garnish with freshly chopped parsley before serving.
Notes
FAQs
1. Can I make these breadsticks ahead of time?
Yes, you can prepare the dough ahead of time and store it in the refrigerator for up to 24 hours. Just bring it to room temperature before baking.
2. What can I substitute for buttermilk?
If you don't have buttermilk, you can make a substitute by mixing 1 cup of milk with 1 tablespoon of vinegar or lemon juice. Let it sit for 5 minutes before using.
3. How do I know when the breadsticks are done baking?
The breadsticks are done when they are golden brown and have a slight jiggle in the center. You can also use a toothpick to check for doneness; it should come out clean.
4. Can I freeze the breadsticks after baking?
Yes, leftover breadsticks can be frozen for up to a month. Store them in a freezer-safe bag, and you can reheat them directly from the freezer.
5. What can I serve with cheesy cheddar garlic breadsticks?
These breadsticks pair wonderfully with marinara sauce, garlic dip, or even as a side to soups and salads.